This documentation will be superseded by the rewritten documentation at docs-beta.theqrl.org.
Head back to Documentation
Documentation
Wallet Basics
This guide will walk you through
- Setting up a new wallet
- Sending a transaction over the network - (Send QRL)
- Receiving a transaction over the network - (Get QRL)
- Checking transaction details on the QRL Explorer, including your current wallet balance
Being Quantum Resistant comes with some inherent challenges. Before creating your new wallet, there are a few quirks worth noting about QRL.
OTS Key Index
When you create a new wallet you create an XMSS tree, which is comprised of many signatures to make a signature scheme. Every signature is referenced as your OTS index or One Time Signature key index.
The OTS key index is limited.
You can only use each key ONCE. When you’ve used your last key, you will no longer be able to sign transactions. This can not be stressed enough!
NOTE With your last key you must empty your wallet. If you use all of your OTS Key Indexes with funds in the wallet, these funds will be lost FOREVER
Best Wallet Practices
- Track all OTS Keys used in a spreadsheet (ledger)
- Store your private keys somewhere safe, in an encrypted manner
QRL Web Wallet
The easiest way to generate a QRL wallet is by using the online wallet found here: https://wallet.theqrl.org
All secure XMSS operations are run in a web assembly compiled version of qrllib locally in your browser or desktop application.
Keys stay in the memory space of the XMSS object, which is destroyed the moment you close the wallet, browser window, or desktop application.
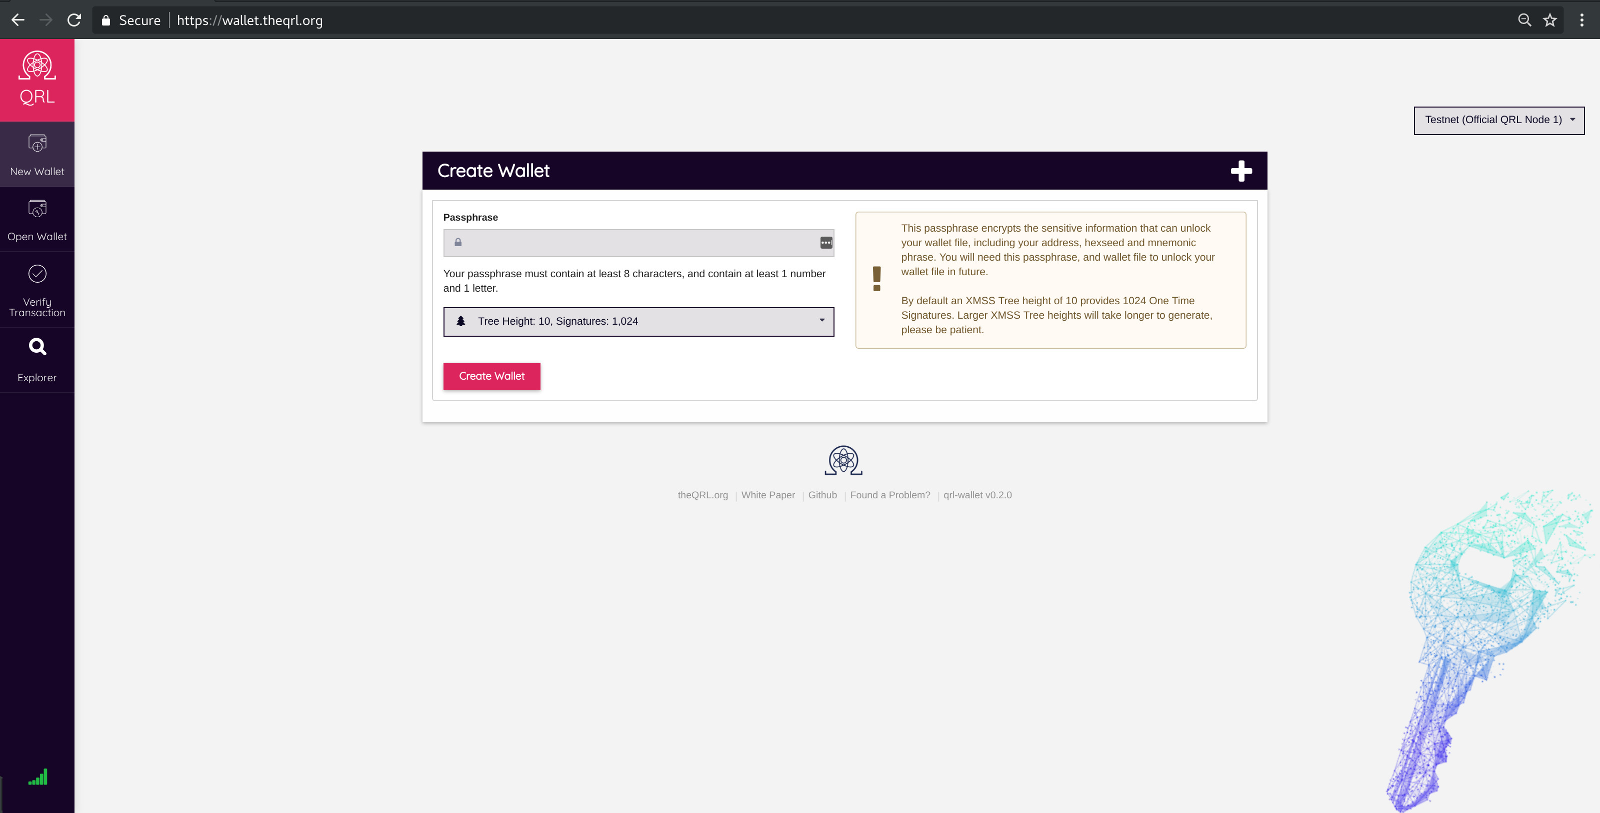
Create a New Wallet
Enter a strong password into the password field. The password must be at least 8 characters in length, and must contain at least 1 number and 1 letter
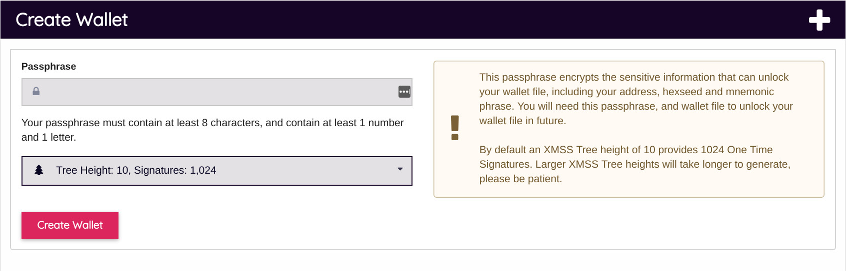
Tree Height
This option allows you to create a wallet with varying tree size. In other words this controls the amount of signatures your wallet can use for transactions safely on the blockchain.
By default an XMSS Tree height of 10 provides 1024 One Time Signatures. You may chose to create a wallet with more or less OTS keys used to sign transactions on the QRL network. The only disadvantage for creating a larger tree height is the time required to generate the additional keys. This can be configured only when a wallet is created.
| Tree Height | Available Keys |
|---|---|
| 8 | 256 |
| 10 | 1,024 |
| 12 | 4,096 |
| 14 | 16,384 |
| 16 | 65,536 |
| 18 | 262,144 |
If needed you can create an additional
slaves.jsonfile with up to 100 slave OTS keys allowing for additional TX’s using the same QRL address. For more information please see the Slaves.json documentation
Hash Function
QRL can utilize multiple hash functions, depending on the setting used during the creation of the wallet.
By default the wallet will utilize the shake128 hash function if no configuration options are given.
| Hash Function | Hash Algorithm | Description |
|---|---|---|
| shake128 | SHA-3 | Default used in the web wallet |
| sha2_256 | SHA-2 | |
| shake256 | SHA-3 |
Which hash function is better to use is debatable, and they all have pros and cons. Most importantly the default can be changed if there is later a vulnerability found in the core cryptography of the hash function.
Create Wallet
After you have made your selections and entered a secure password, click the create wallet button and a new wallet will be generated. This will produce a sensitive screen once the address is created.
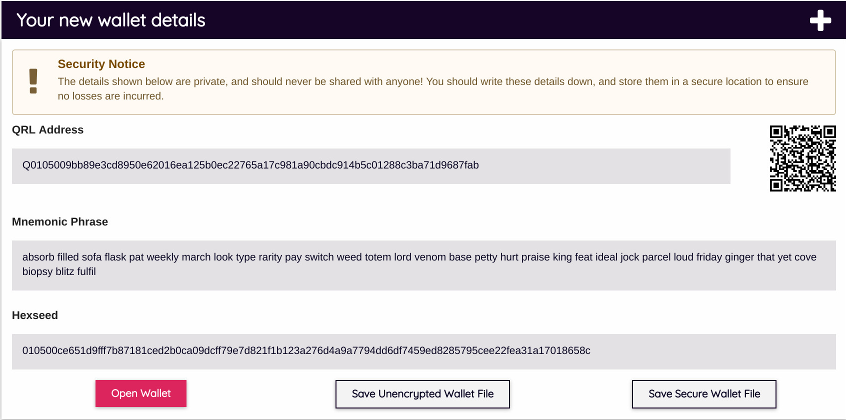
This screen prints your public QRL address, your Mnemonic Phrase, and Hexseed directly to your screen. Write these down somewhere safe, they will recover your wallet.
Important: Record Your Private Keys! Do Not Lose Them!
It’s recommended to Save a Secure, encrypted wallet.json file. You will need your password to unlock this file anytime it is loaded into the wallet Don’t Forget This Password!
Welcome to the Quantum Resistance!
Open QRL Wallet
By using the recovery method you have created, you can access your wallet to send or receive QRL.
Enter your information into the “Wallet Seed / File” field. Make sure the drop down on the right matches the data you chose (Mnemonic, Hexphrase, or wallet file).
Click “Unlock Wallet” and your QRL wallet will open allowing you to check balances and interact with the QRL network.
Send QRL
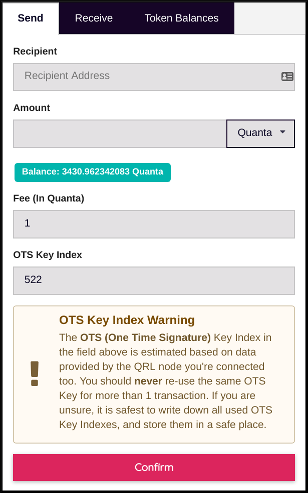
With the wallet unlocked, you can now send QRL.

To send QRL there are four fields you need to fill in:
| Field | Description |
|---|---|
| Recipient Address | A valid QRL address |
| Amount | How much QRL to send |
| Fee | How much you are paying to make this transaction |
| OTS Key Index | Enter an unused OTS Key |
Keep track of used OTS Keys! The web wallet will keep track of your OTS key index for you from the blockchain, but it is good practice to write this number down after each use.
Make sure everything is correct and click the confirm button. The transaction will be propagated across the QRL network and deposited into the address you entered. Your screen will show the confirmation details as the transaction is sent.
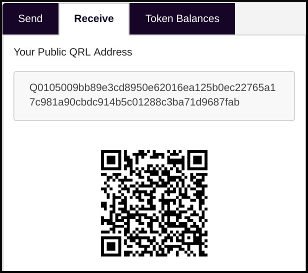
Receive QRL
Simply give someone your QRL address and they can send you coins. You don’t need to have the wallet opened in order to receive QRL.
Click the receive tab in the wallet and you will see your wallet address and QR code. Send this to whomever you are receiving coins from.
Check Wallet Balance
With the wallet opened you can see the balance in the main screen of the web wallet. You can also check your wallet balance without opening the wallet by browsing to the QRL Explorer and entering your address into the search field.
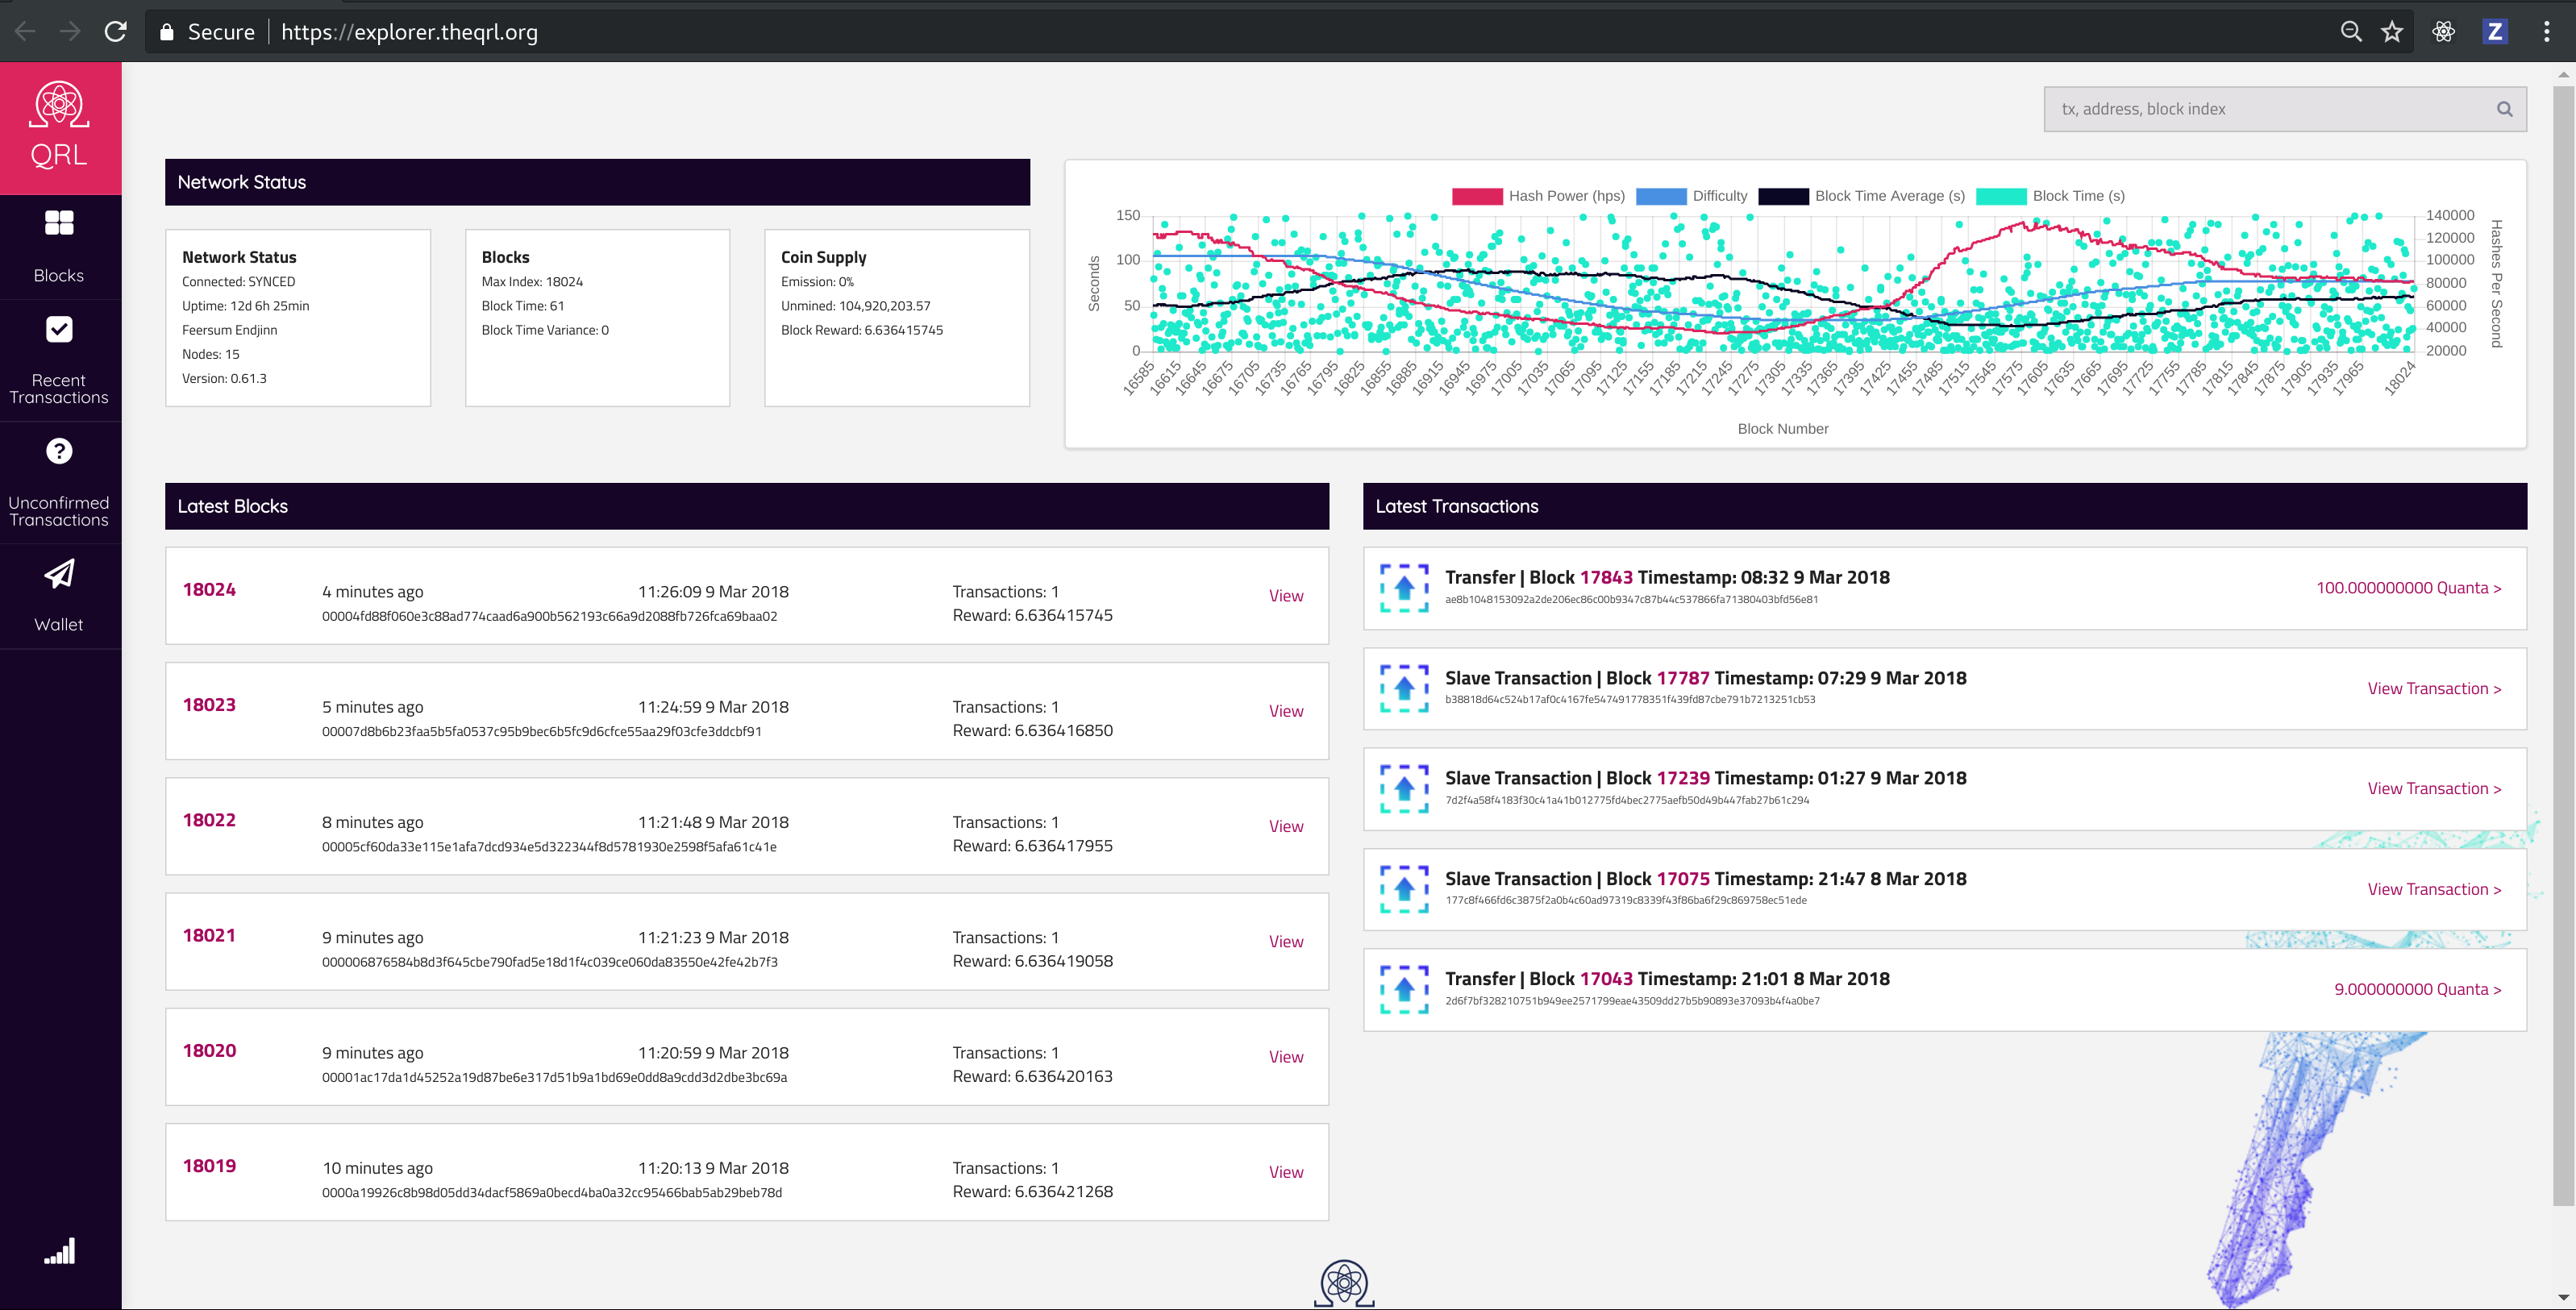
You will see all of the transactions the address has as well as the balance of quanta and any tokens held by the wallet.
Find Remaining OTS Keys
If you need to find the remaining OTS keys for an address, you can see them in the meta tag in the Block Explorer. Search for your address in teh search bar and simply expand the meta tag at the bottom of the screen to see the used OTS keys.
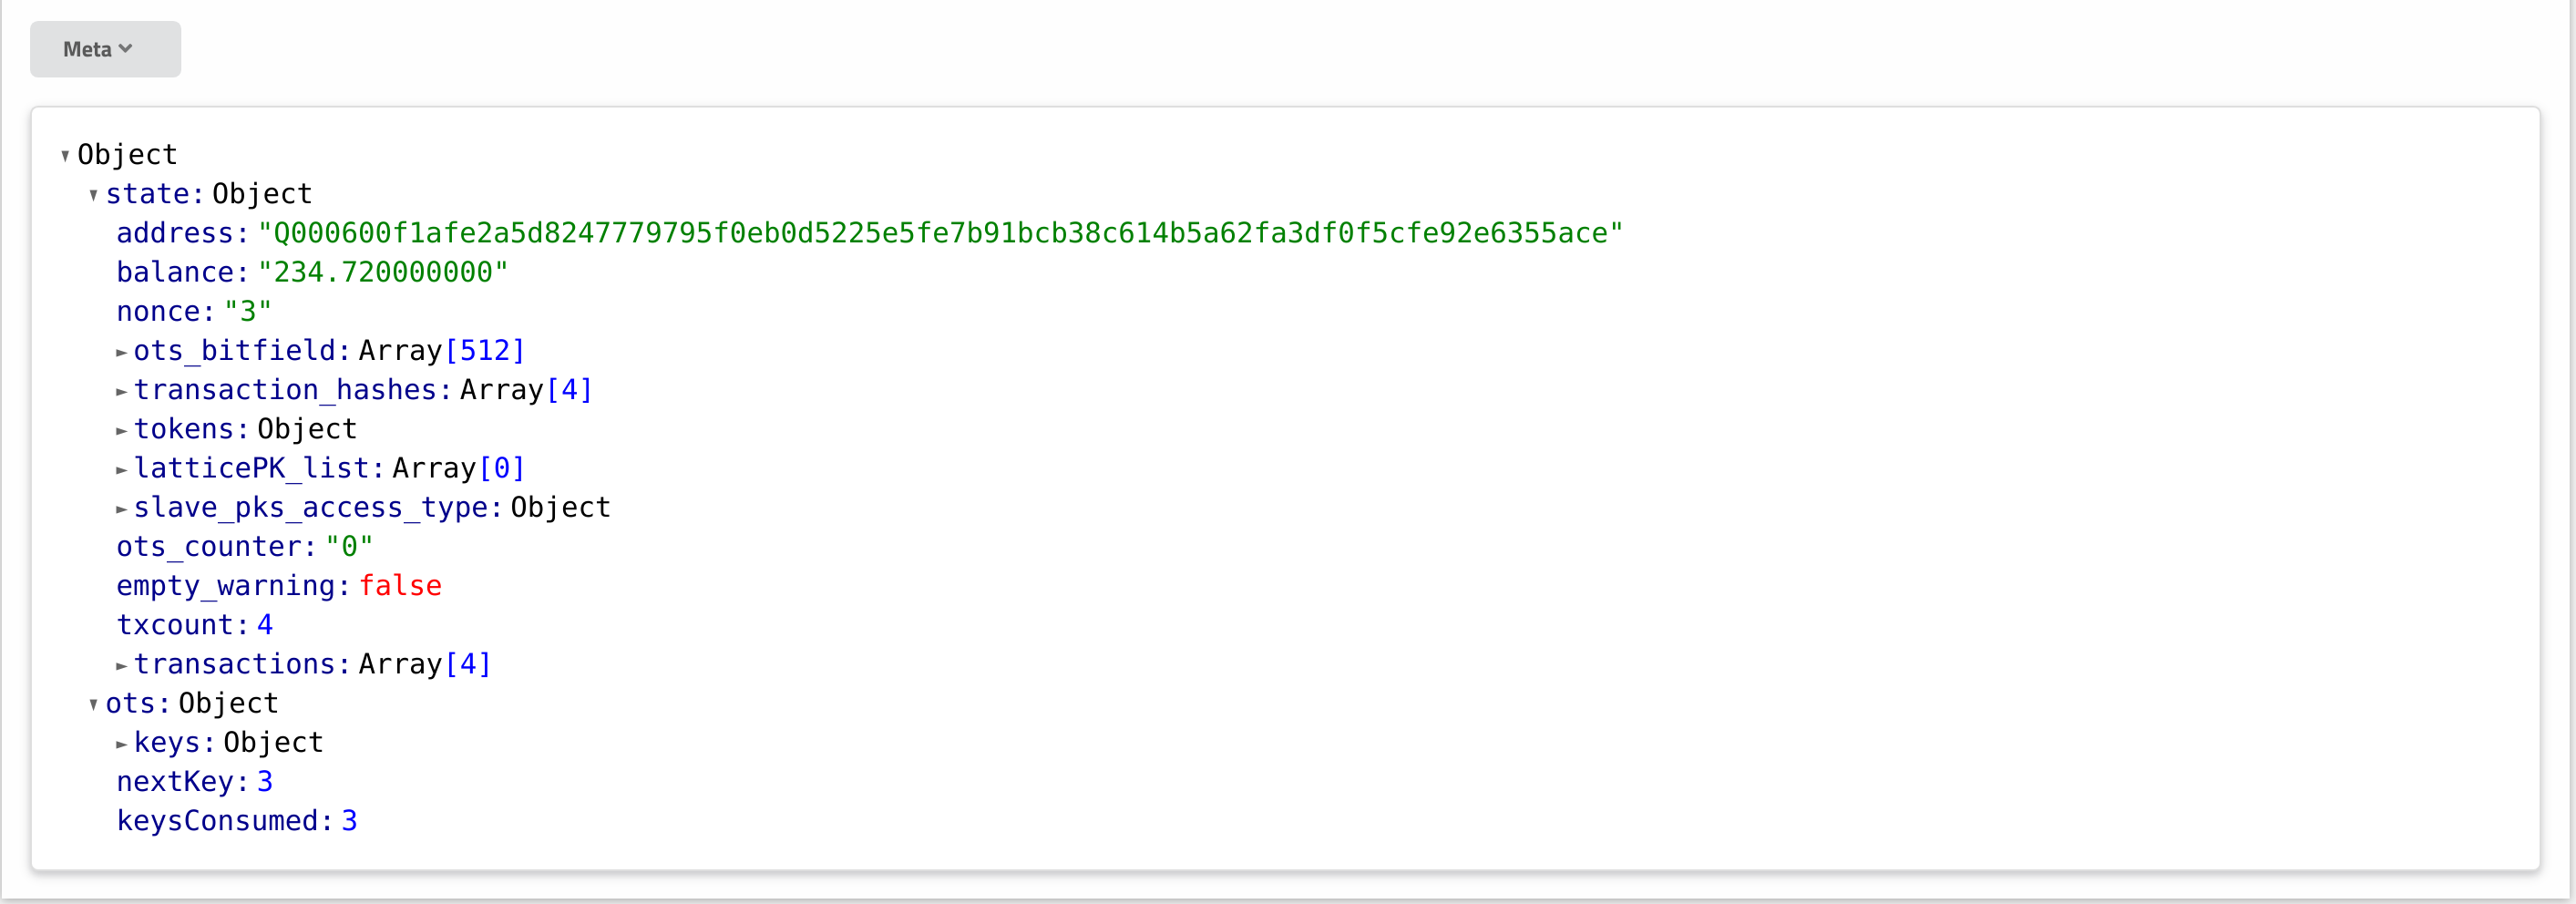
Once you have passed the OTS Bitfield of 4096 OTS keys you will need to use the keys in order, sequentially. If you skip a number you will not be able to go back and use it past the Bitfield.
| Keys | Info |
|---|---|
| 0 –> 4095 | Bitfield tracks the use. May be used in any order |
| 4096 –> Last OTS | Must be used in ascending order, advances OTS from largest key used |